
Before you set your tile...
We always recommend dry-fitting your pattern to think about your cuts in advance and to make sure you like the pattern. With an installation this permanent, why wouldn't you want to lay things out first?
Take some time to look at finished rooms and get ideas for what can be done in your space. Take into consideration the number of cuts needed for a pattern, how many grout lines you'll have (and how wide you want them), and if anything will be obscuring the pattern (area rugs or furniture on a floor, appliances in front of a backsplash, etc.).
Is your room long and narrow? Is it full of lots of obstacles and angles? Where will your grout lines fall? Where will you make cuts?
By setting aside some time to plan in advance, your installation will proceed smoothly and you'll feel more confident when making decisions.
Pattern Ideas and Inspiration Pictures
Square-Set, Stacked-Set, or Grid Pattern
The most common and easiest tile layout, laying tiles in a grid is very simple. Setting your tiles square with a corner will minimize the number of cuts needed. Unfortunately, this pattern can look boring or sterile when used with a plain, neutral tile. Try incorporating stripes or color blocking to create interest. Consider a checkerboard pattern, or add an accent stripe.
The key to this pattern is to make sure you have no "slivers" (thinly cut tiles) in visible areas, as this looks shoddy and unprofessional. Dry-setting your tiles is very important when your lines are parallel to your walls, as any bad cuts or odd angles will be highlighted by this pattern. If your layout results in a full tile on one end of the room and a thin cut tile on the other, try offsetting the design by half a tile so you have slightly over half a tile on both ends of the room.
A Tile Lines Tip: Most houses aren't square. Using a level on wall layouts will help prevent a dizzy "everything's slightly slanted" look. For floors, look at where your cuts will be. Instead of ending up with a small cut piece slowly getting wider along one side of your room, offset your pattern by half a tile. A row of half tiles that's slightly wider at one end of the room is less noticeable than a row of thin sliver tiles go from 1? wide to 2? wide.
Check out our bathroom floor plan: instead of a full tile at the door and a sliver at the tub, we shifted the pattern so there?s a half tile at the door and at the tub. Instead of having a full tile behind the toilet and a partial tile on our very visible wall, we put the full tile against the visible wall and hid our cut piece behind the toilet.
Diagonal or On-Point
This isn?t a specific pattern; it?s a layout technique. Any pattern can be turned at an angle to instantly create a more dynamic, interesting look.
The diagonal pattern can make a small room look bigger. If your walls aren't perfectly square, a diagonal layout will hide imperfections.
However, because the tiles no longer line up with your walls, setting tiles on the diagonal increases the number of cuts you have to make at the perimeter of your installation.
Lines draw the eye to focal points
Decide what you want to be the focal point in the room, then use the tile layout to direct attention to it. Accentuate the length and draw attention to the view outside of a window, or make the room look wider, or draw attention to your fancy bathtub or your lovely vanity.
Offset, Running Bond, or Brick Pattern
Take any size square or rectangle tile, lay them in rows and shift each row to create an offset pattern. The offset/brick pattern can have several potential effects.
A 50/50 offset (the most common brick/running bond pattern) creates a strong, traditional look.
If you're installing larger tiles with a long shape (6x24" tiles, wood plank tiles, etc.), it's recommended that you don't use a 50/50 offset, as these tiles can have a slight bow in them. A 50/50 offset will put the highest point of one tile next to the lowest point of another tile, creating lippage. Most tile manufacturers suggest a 30/70 offset or less for their long tiles.
A varied offset (40/60, 30/70, etc.) creates a softer, more natural look.
A Tile Lines Tip: If you use your cut pieces and scraps from one row to start the next row, you'll have very little waste at the end of the project. Use your scraps!
An irregular offset laid vertically on a wall can create an organic waterfall or bamboo effect, while an irregular offset on the floor is the most popular and most natural looking wood tile layout. If you plan strategically, you'll have very few cuts to make, as your cut piece from one row can start the next row instead of being tossed in the garbage.
Pinwheel or Hopscotch
The pinwheel pattern, also known as "hopscotch", is more simple than it looks! Take any two rectangles or squares of different sizes, align them on one side, and repeat.
This pattern is a great way to incorporate two different materials into the same space and create a dynamic, varied appearance.
Use two sizes of the same product for subtle movement, or use a contrasting color or material for more of a decorative effect.
Herringbone pattern
For the herringbone pattern, simply take any rectangular tile, turn one so that the two are perpendicular to each other, align them along one side, and repeat.
You are essentially creating an L-shape with your two tiles, and these L's will nestle next to each other for a simple repeating pattern.
Any size rectangle will work for the herringbone pattern, forming a dynamic zig-zag that works in both contemporary and traditional settings.
Read this great Houzz article about the difference between Herringbone, Chevron, and Flame Stitch Patterns!
Chevron Pattern
The chevron pattern, like the herringbone, creates movement with rhombus shapes lining up to form an arrow-like effect.
This pattern's a bit trickier; unless your tile is specifically cut to create a chevron, you will have to cut each and every individual tile to create the dynamic points of the chevron pattern, which will be time-consuming and costly.
Some rectangular tiles will come with a chevron design printed on them for easier installation. Check to see if the pattern/color lines up from tile to tile.
Many mosaics come with chevron shapes built onto the mesh sheet, so you just have to cut the sheets at the perimeter of your installation.
Several modular lines come with cut rhomboids that can be used to create a chevron pattern. You can use contrasting colors to create a zig-zag line, or use all one color for a more subtle pattern. The rooms below show examples of single color chevrons, gradients, zig-zagging stripes, and even a houndstooth pattern.
French,Versailles, or Roman Pattern
Traditional, elegant, interesting, and timeless; this pattern utilizes several different shapes and sizes to create a random, varied appearance. As such, you'll need a tile product that was specifically designed with the Versailles pattern in mind, or else this pattern won't work!
If you have your heart set on this pattern, let us know and we can show you several lines of porcelain, travertine, limestone, slate, or marble that have the correct size options for the Versailles. Some lines are even sold in pattern bundles to make constructing this pattern is as easy as possible.
Modular Tile Lines
There are some tile lines that come with multiple sizes, colors, and unique shapes that can be combined to create dramatic geometric installations or subtle, dynamic patterns
Within these tile lines you may get rectangles, hexagons, triangles, trapezoids, or rhomboids with which you can create chevrons, weaves, cubes, stripes, or something completely different.
Most manufacturers will also offer helpful guides showing all the different patterns and designs you can create with their tiles. Use geometry to your advantage with modular tiles!
Unusual Shapes
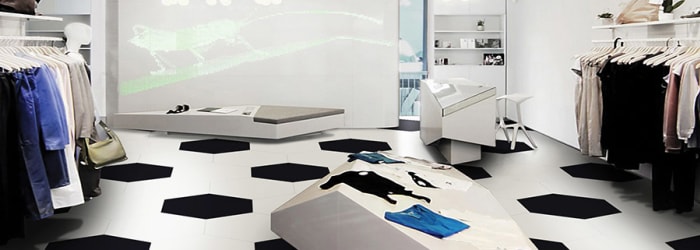
One easy way to create a unique space is with a unique shape! Uncommon shapes such as hexagons and diamonds are inherently interesting, and can be used to create a look that can't be replicated with right angles and rectangular tiles.
Hexagons can look very vintage in a black and white bathroom?
?or very modern in a neutral color palette with subtle textures.
An elongated hexagon creates a picket shape that can fit mid-century modern or shabby chic designs alike and create vertical or horizontal movement.
Diamond shapes can evoke a Renaissance harlequin for a quirky old world aesthetic.
These L-shaped tiles can be arranged in any number of patterns for a complex geometric design.
Curvy shapes can evoke natural elements, like wind, water, vines, and leaves.
Jazzy geometric shapes suit a mid-century modern style.
A classic arabesque or lantern shape is elegant.
Depending on the color of your scale shaped tiles, they can evoke fluffy clouds, your favorite fish, or a mermaid fantasy.
Patterned Tiles
Why not let your tiles do the work for you? Instead of a clever layout, a stylish patterned tile set in a traditional square grid has a lot of visual impact with less effort put into layout. Whether your pattern is bold and dramatic or subtle and soft, a patterned tile adds instant interest to a room. Dozens of patterned porcelain tile lines are available, but here are a few favorites:
The Intarsi line imitates ornate wood inlays fit for a king. More durable than real wood inlays at a fraction of the price.
The Tribe series offers a simple collection of tiles with hand-drawn diagonal patterns, with which you can create infinite pattern combinations.
The Cementine collection imitates encaustic patterned cement tiles. Encaustic tiles have been around for centuries, but this old world style is experiencing a surge in popularity. The various Cementine porcelain tiles offer warm colors with retro patterns.
3D Tiles
There are many ceramic wall tiles with raised, 3D patterns. They create a sense of texture and depth while still being low maintenance and creating a clean look. Patterns range from the organic (vines, waves, roses) to the geometric (zig zags, stripes, cubes). Add interest without getting too busy with 3D wall tiles!
Borders & Listellos
Your installation is a work of art; why not frame it? By using a decorative border, you can separate spaces, form focal points, create a faux-carpet look, or direct the eyes of your guests to points of interest.

